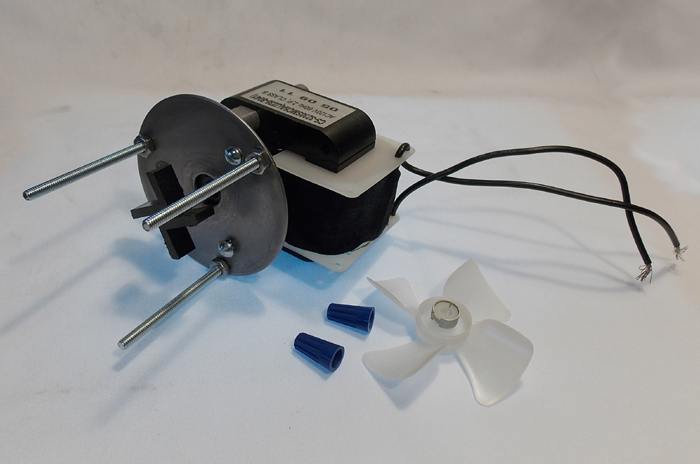
This is a replacement for
the large type pump motor used by San Marino from 1967 to 1979
This will also fit all Pontrelli fountains.
You will have to drill 3 new holes in your bowl, see instructions below.
TOOLS REQUIRED
Small wrench, slotted screwdriver, drill and 3/16" drill bit, and
silicone adhesive.
After you install our adapter plate and screws you can just purchase our standard air cooled pump part number
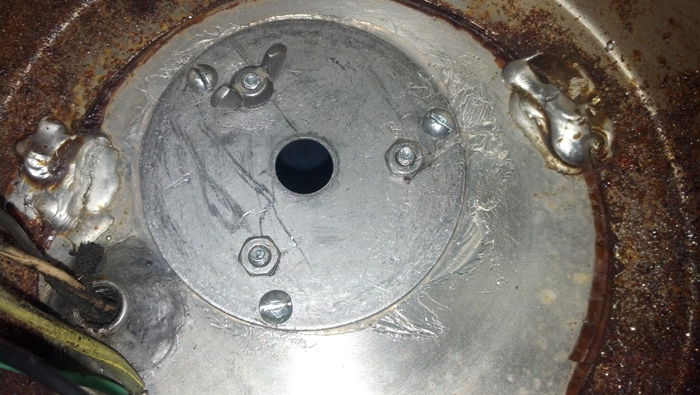
Remove impeller. It is pressed on and you will have to pry it off.
Try not to ruin the clear plastic disk, you will have to use this again too.
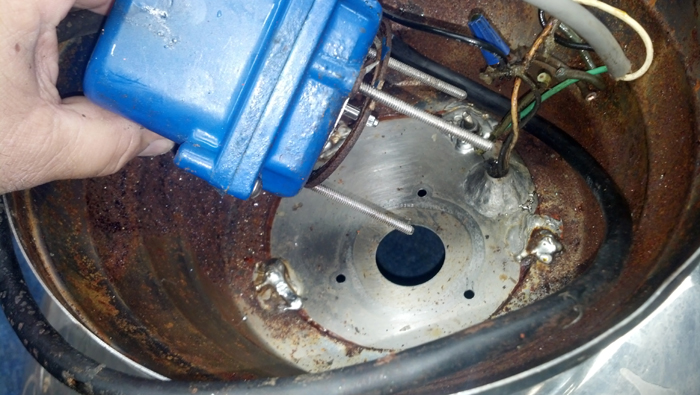
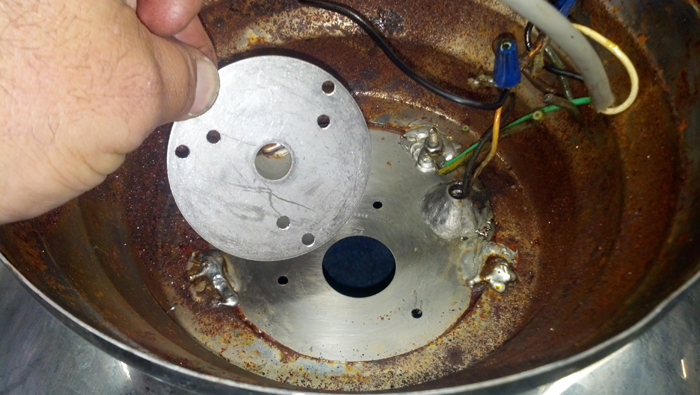
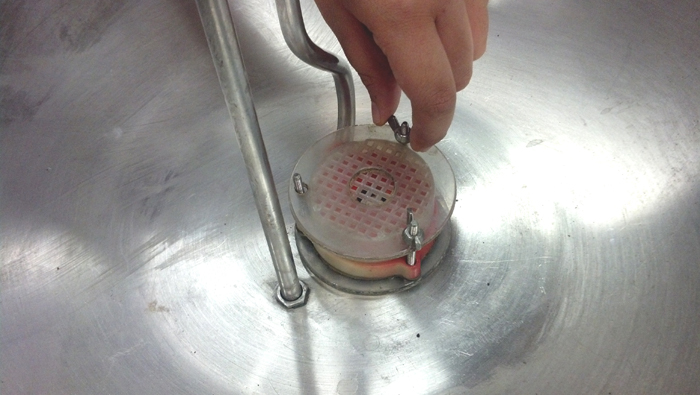
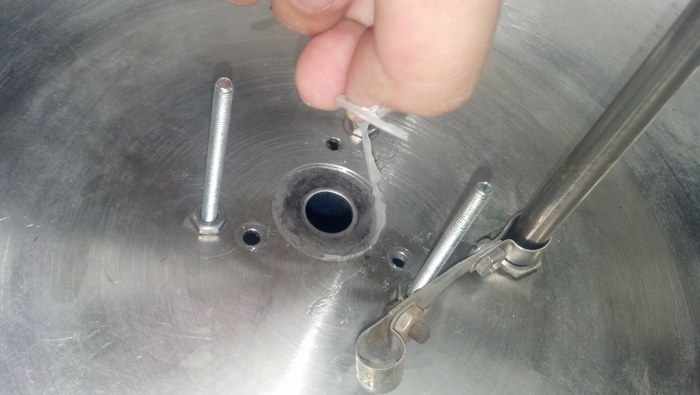
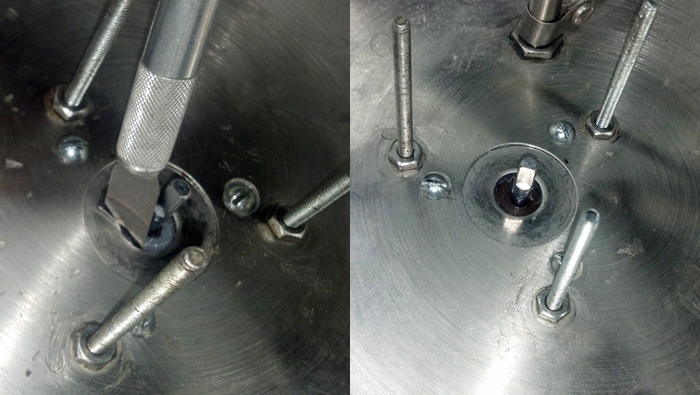
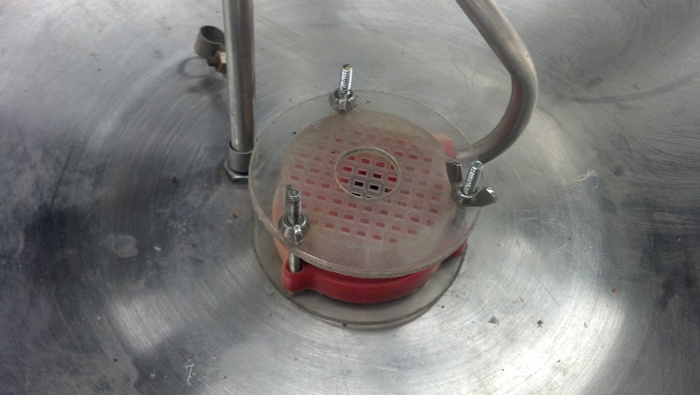
Place the adapter plate on the bottom side of the bowl.
Install the 3 short screws and be sure the inner holes are rotated clockwise.
Be sure the smaller hole pattern are aligned as shown.
See they are slightly rotated
in the clockwise position?
This is so the new pump will centered properly in the base.
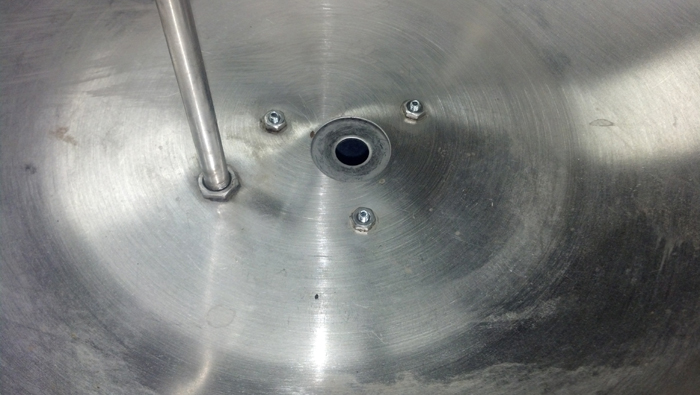
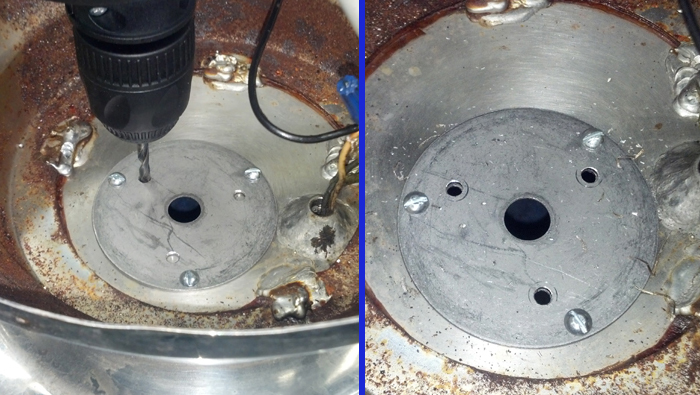
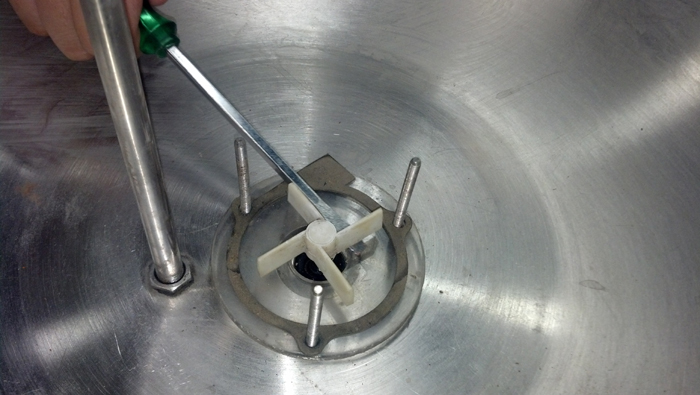
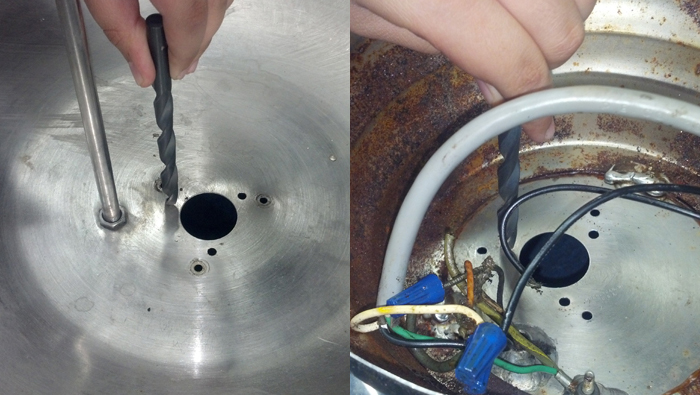
Drill through the 3 center holes using an electric hand drill and a 3/16" drill bit.
We have the drill bits available.
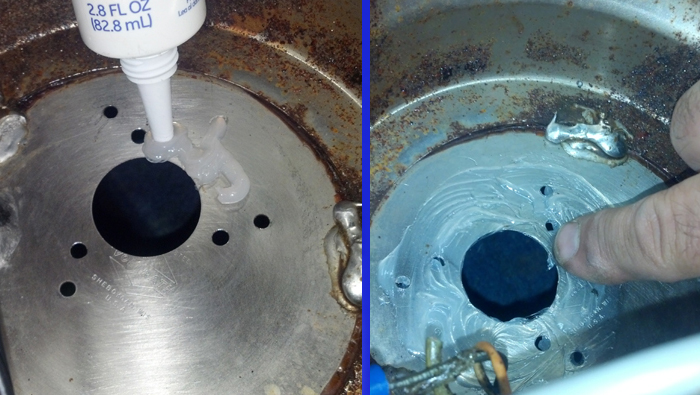
Using clear 100% Silicone, apply it to the bottom of the bowl.
Smooth it around making a diameter that is about the same as the adapter plate.
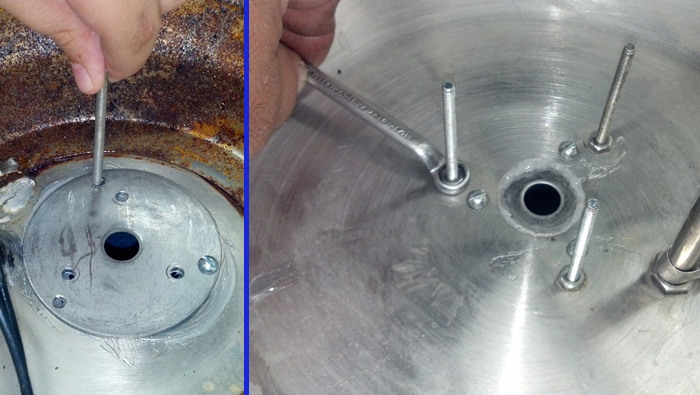
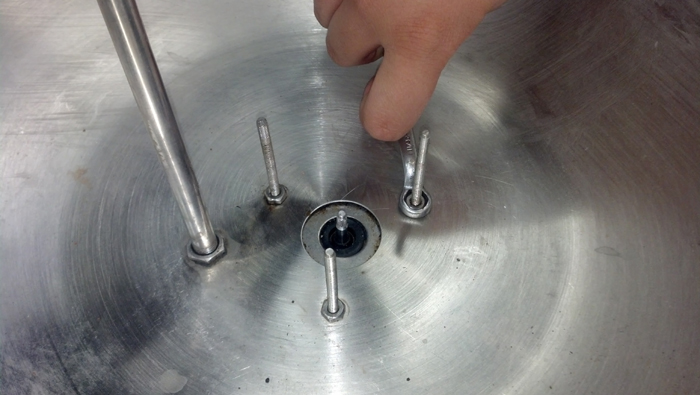
Install the long screws in the outer holes and tighten the nuts on the long screws.
You can put the short screws through the holes to keep everything aligned.
The long screws will never be removed again so make them tight.
Install the short screws while the silicone is fresh.
You can use any of the old nuts you removed from the old pump.
Make sure all t he screws and nuts are tight.
The silicone should squeeze out from between the 2 plates.
After the silicone will hardens in 24 hours remove the 3 short center screws.
Remove the oozing silicone from the inside of the bowl. After it is hardened it will pull off easily.
You do not to need to remove it from under the bowl but the face of the adapter plate needs to be clean.
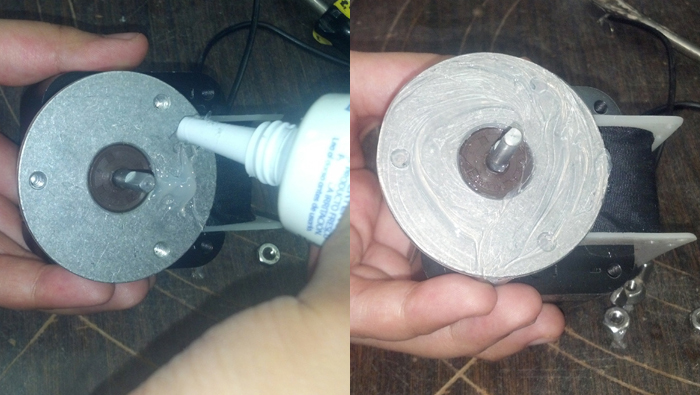
Apply clear silicone to the face of the pump motor.
Spread it to coat the entire metal surface. Try to keep it off the center rubber seal.
A trick is to put a little Vaseline on the shaft and on the seal so the silicone doesn't stick to them. It doesn't take much and be careful not to get it on the face of the pump flange.
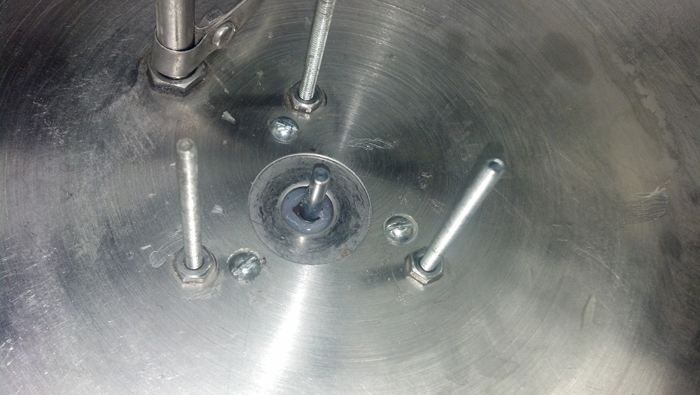
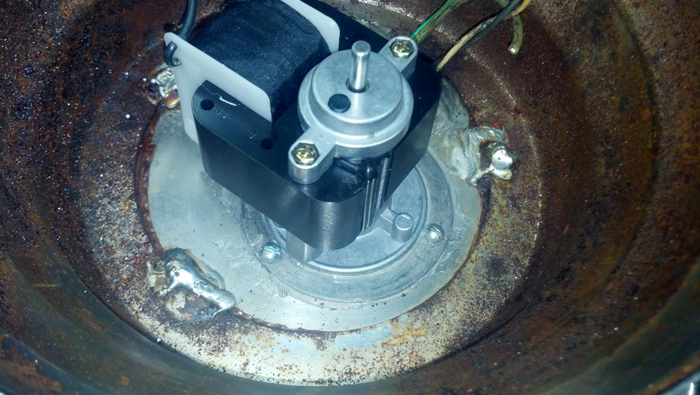
Install the motor into the bowl and tighten the screws tight. You will not remove them again, unless you need to replace the motor again in the coming years.
You should see silicone oozing into the center.
After the silicone hardens remove the ooze from around the seal and shaft.
You may have to cut along the edge. Be careful not to damage the seal.
Clean any silicone that may be around screws and nuts.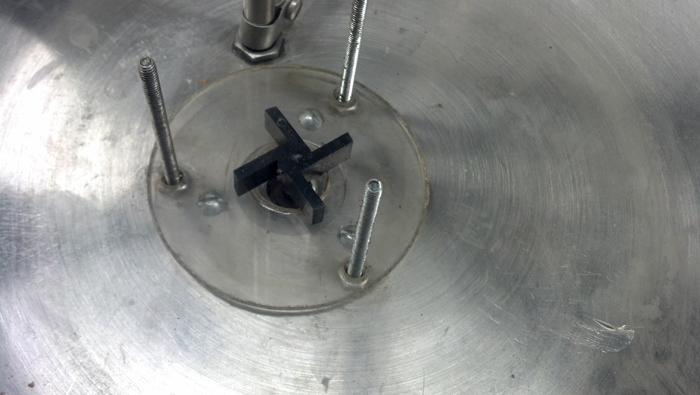
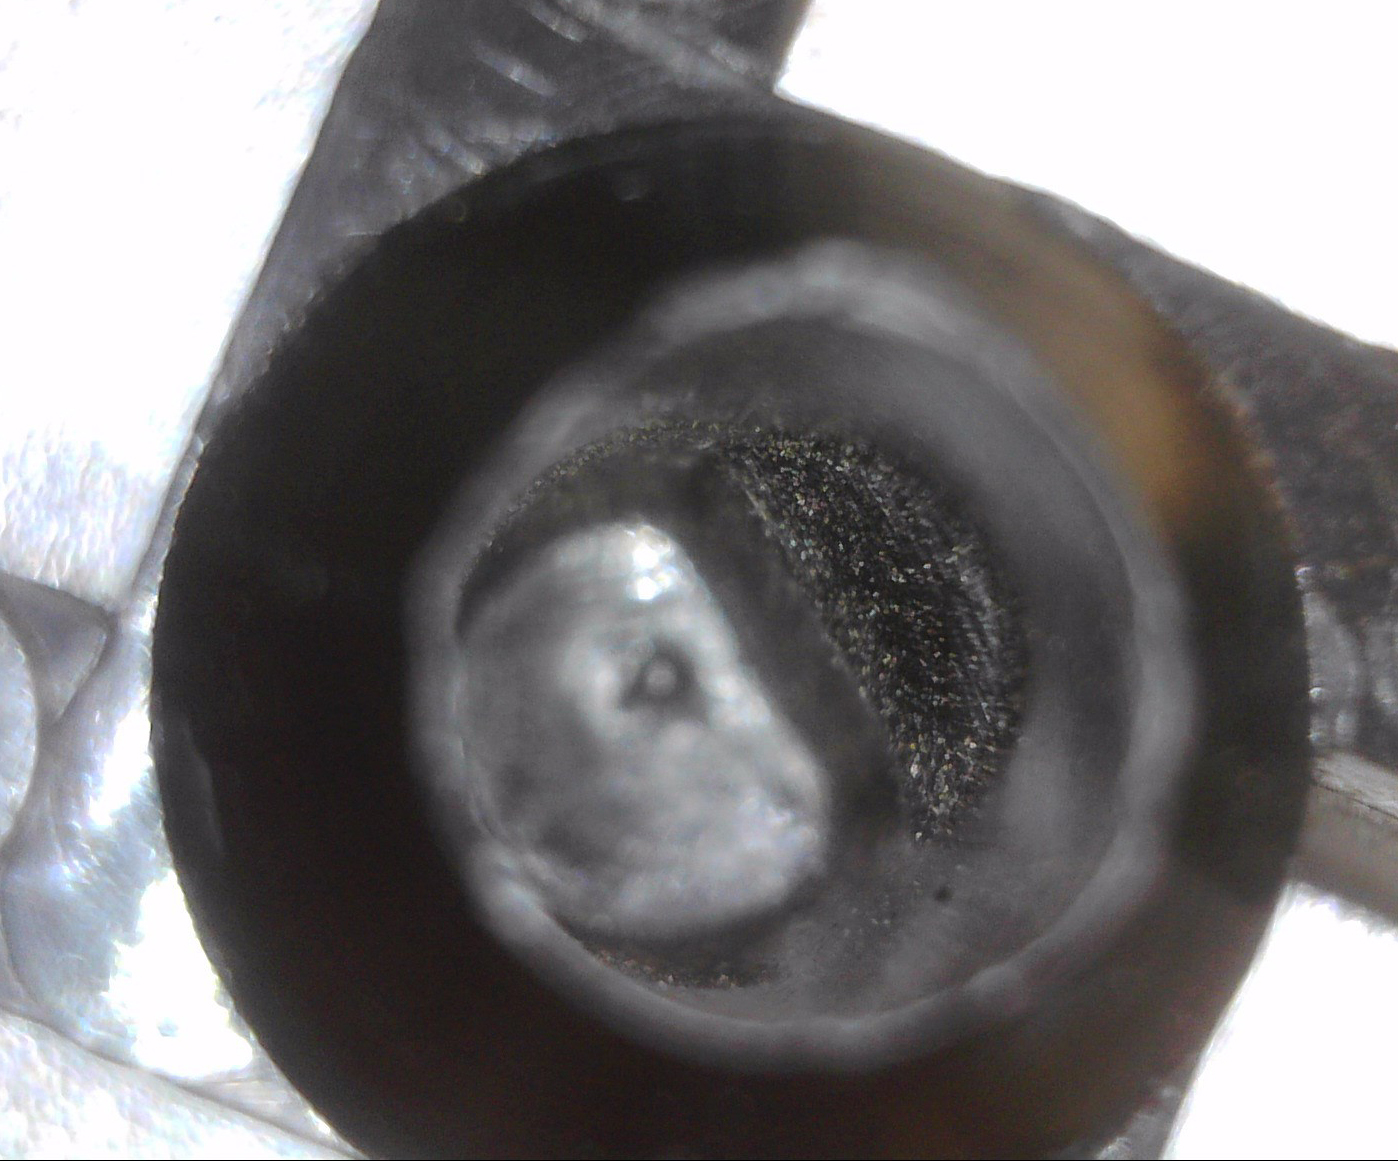
Install your original clear plate and new impeller supplied in our kit. Be sure the flat inside the impeller hole lines up on the motor shaft.
You will have
to look inside the hole on the impeller to see the flat. It's kinda hard
to see but it is there. Click to
enlarge picture
Install your original pump housing.
We do not have a replacement for this part.
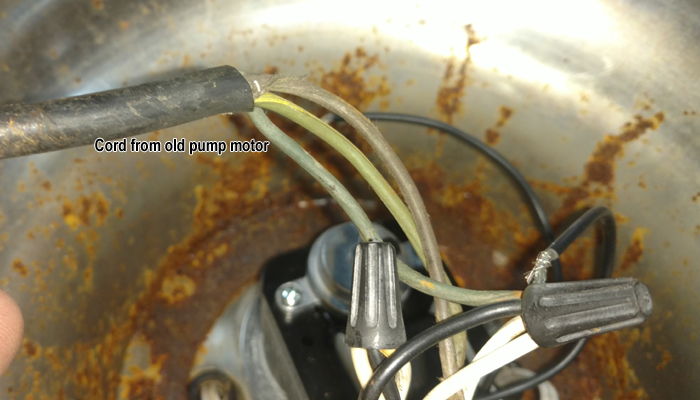
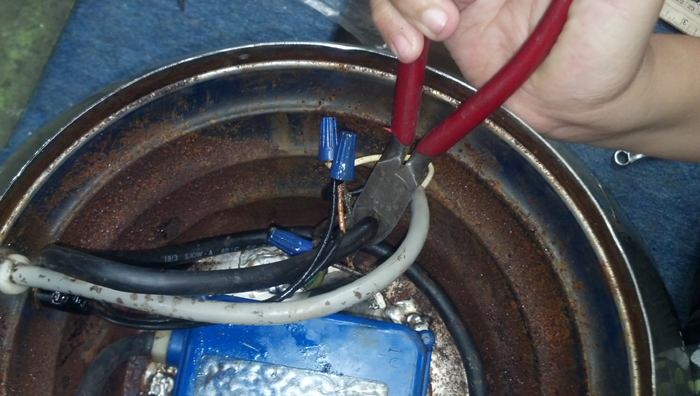
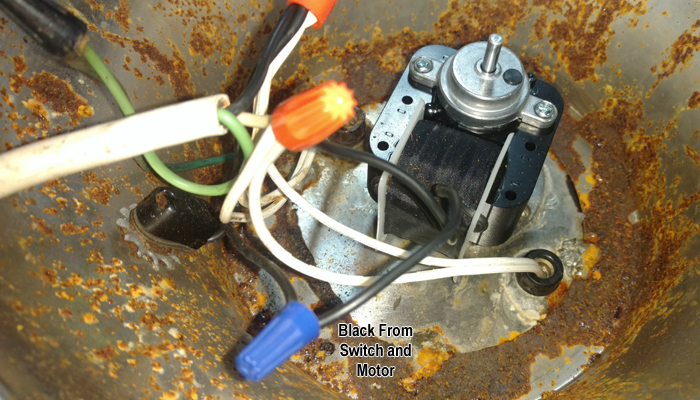
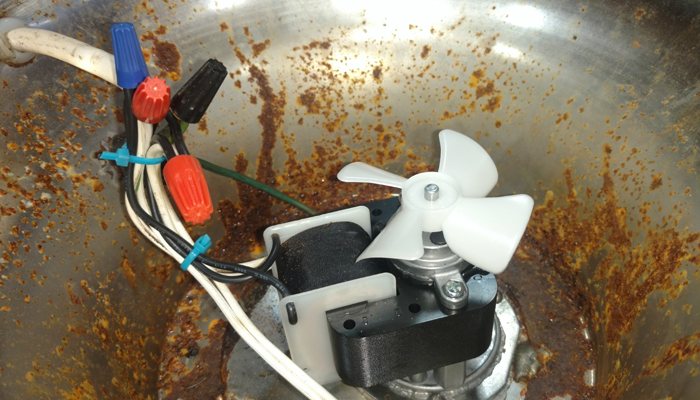
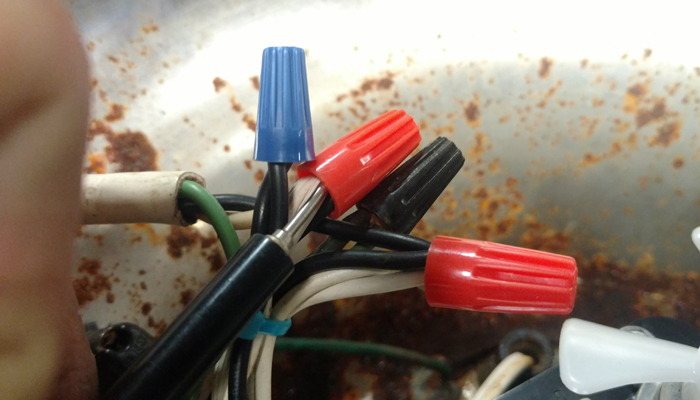
Now find the wires that you cut from the old pump.
These may be brown, blue, green, black, or red.
Most important is the green
wire.
This is the safety ground wire. All of the old pump cords should have
a green wire.
==========================
Before we start, some fountains
have only white wires coming from the lamp poles.
The ribbed wire is the neutral or "white" wire, the smooth
one is HOT or "black".
More on this at bottom of this page.
![]()
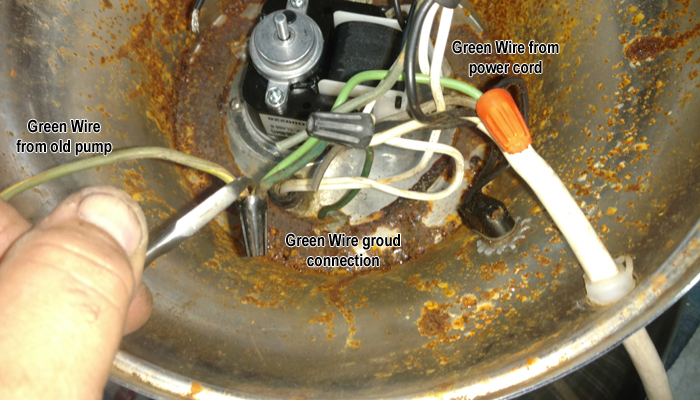
This green wire is attached to the green wire from the power cord and another that is grounded directly to the metal surface.
You can just
cut the old pump wire at the wire nut or
unscrew the wire nut and remove it.
BE SURE THE GREEN WIRE FROM THE POWER CORD IS GROUNDED TO THE METAL PART OF THE FOUNTAIN
You should not have to touch
the white wire group from the power cord.
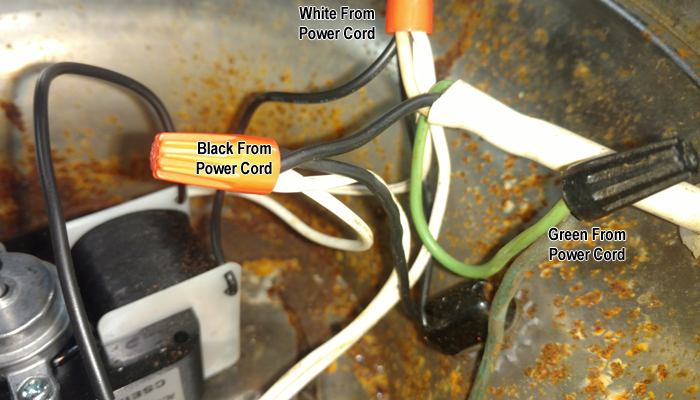
White from power cord
white from lamp poles
One wire from pump motor.
--------------------------------------
Black from power cord. You can just take the old pump wire that's connected
to that group and connect it to one of the black wires from the new pump
motor.
Black from cord
Black from lamp poles
One wire from switch.
--------------------------------------
Green to Green
Connect one white from motor
to the one wire from the switch.
------------------------------------
The fountain is now wired so when it is plugged in the lights come on
and the switch only turns the pump on and off.
------------------------------------
Never run the pump without fluid in the fountain bowl. If you do for extended periods of time the seep will burn out and fluid will leak into the motor area.
If this happens the pump motor will need to be replaced, but you won't have to install another adapter plate.
No just imagine if you left that nasty old oil filled pump in there with a bad seal leaking oil into the beverage.
Make sure all the wire nuts are tight and no exposed wire is visible.
Install the cooling fan and tie the wires together away form the fan.
The fan provides adequate cooling just circulating the air inside the base. No vent holes are required.
Be sure to properly install your original base cover.
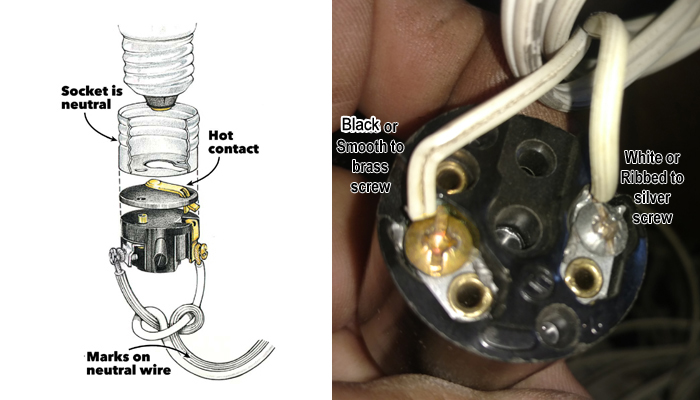
It is important that the white or neutral wire is attached to the correct side of the socket.
If both wire to the socket are white be sure the ribbed wire is attached to the outer socket. Sockets have 2 screws and one is usually silver or natural color, this is the neutral or white side.
The other socket screw is usually brass color and this is the HOT or black side.
THIS IS IMPORTANT. If you have the wires reversed you can get shocked from touching the outer socket of the bulb while unscrewing it.
You should be good to go now.